Friday, November 30, 2018

How to Stay Energized During Pregnancy

It’s no secret that pregnancy takes its toll on the body. After all, you have another human growing inside of you while your own body is going through a myriad of changes! With hormones in flux, keeping your energy levels up can seem impossible. If you’re wondering how to stay energized during pregnancy, we have a few simple tips and tricks for you. We’re here to help you get through every phase of your pregnancy.

By making a few minor adjustments, pregnancy can be a wonderful time in your life. Your skin will glow and it’s totally possible to feel great! Just follow these tips to help you keep your energy levels up by eating nutrient-dense foods, exercising the right amount, and taking prenatal vitamins (if recommended by your doctor).

Eat Plenty of Nutrient-Packed Foods

Wondering how to stay energized during pregnancy without your regular caffeine boost? Turn to foods that are naturally full of vitamins and nutrients instead! Load up on meals that are full of protein and iron, both of which will help you feel less tired and boost energy levels. Check out these recipes that are full of protein, and this list of plant-based foods that are rich in iron.

Staying on the lower end of carbohydrates and starches will also help keep your energy levels consistent. That will help you avoid a carb-coma later in the day. If you’re going to eat carbs, try to choose complex carbs and whole grains that will keep you feeling fuller for longer. To put all these tips together, go to this master list of high-protein, low-carb foods and even some snacks to give you energy the natural way!

Exercise (But Not Too Much)

You don’t have to forgo all exercise during pregnancy, but too much will make you feel completely drained. If you want to learn how to stay energized during pregnancy, finding the golden balance of just the right amount of exercise can be tricky. Once you find it, you’ll get that much-needed energy boost when you’re feeling tired.

What’s the best way to figure out your balance? Low-intensity cardio is a great way to stay in shape during pregnancy—it helps keep your weight in-check without completely depleting your tank, like high-intensity cardio workouts. Running is also another great way to exercise during pregnancy, so check out our plan on how to maintain your running routine even while pregnant.

Even exercise like yoga can be beneficial, especially since pregnancy can bring on unwanted aches and pains. Try these poses to help with back pain. Or, go for this routine to start your day feeling energized!

Talk to your Doctor About Prenatal Vitamins

Even with proper diet and exercise, pregnancy can take a toll on anyone. It’s incredibly important to stay up-to-date on your doctor visits and make sure your labs are within normal range. Prenatal vitamins can help round out any deficiencies you may have in your diet. At the very least, it’s usually a good idea to take a multivitamin, just so you know you’re getting a little bit of everything you need.

We recommend these seven supplements to help you feel amazing. But, remember to talk to your doctor or primary physician before you start taking any vitamins supplements. He or she might even have a better recommendation on what you should be taking based on your personal health. Always defer to your doctor’s best judgement!

This is an exciting and chaotic time in your life, so it’s important to feel your best! With these little adjustments, your energy levels will be on the up-and-up before you know it. The best answer to how to stay energized during pregnancy is take everything one day at a time and try to roll with the punches. Your body will thank you in the long run for listening to it!

Looking for more tips from SkinnyMs.? Head over to our Facebook, Twitter, Instagram, and Pinterest to stay updated on the latest content!

The post How to Stay Energized During Pregnancy appeared first on Skinny Ms..


source https://skinnyms.com/stay-energized-during-pregnancy/

Skinny Mississippi Pot Roast

I was never really a picky eater as a kid, but for some reason I had a serious aversion to pot roast. In fact, I disliked it so much that I eventually began to dread the sight of my mom’s Crock Pot. My mom made–and still makes–lots of other delicious things in her slow cooker. So, I’m not sure why the pot roast association was so extreme. Regardless, to this day, when my mom’s Crock Pot appears on the counter (still the same one from when I was a kid!), I get a weird feeling of dread.

It’s funny that still happens because I actually love pot roast now! Why wouldn’t you: It’s a Crock Pot classic for a reason. Hearty, homey, filling, and super easy, it checks off all the boxes of any good slow cooker meal. Just toss a few ingredients in the pot, leave it alone all day, and when you come back, dinner is served. Not only that, but most good pot roast recipes also happen to be super economical. Leftovers will last you at least a few more meals, and they’re so easy to freeze if you don’t feel like eating pot roast for multiple days on end.

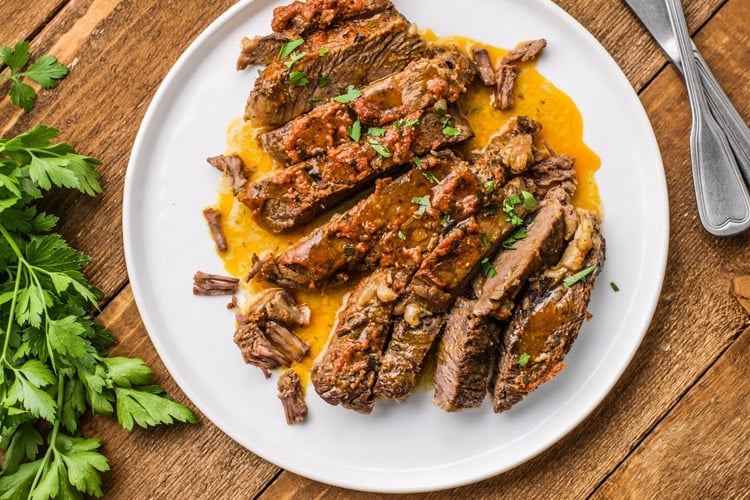
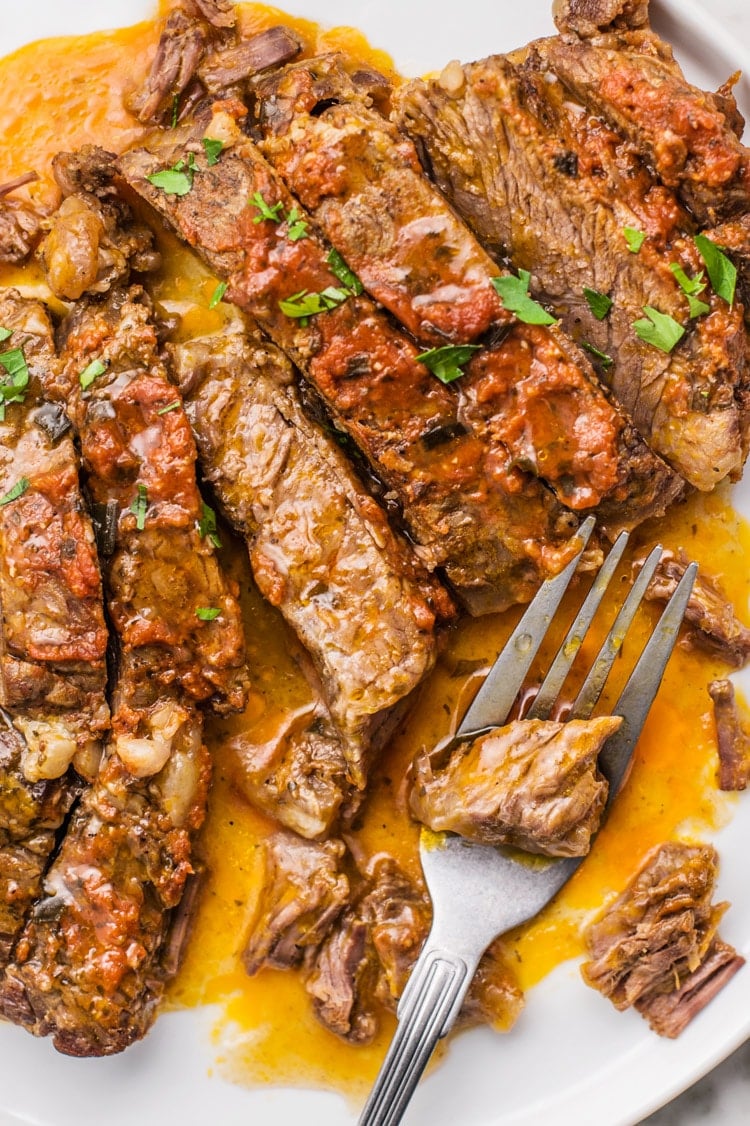
This Skinny Mississippi Pot Roast recipe is a lightened-up version of everything you love about this classic slow cooker staple. You only need a few ingredients and even fewer hours in the Crock Pot to get this tasty dinner on the table. And it might be made with clean ingredients, but this slimmed-down recipe still has all the savory, melt-in-your-mouth tenderness that you’ve come to know and love.

Just Three Minutes Prep

Yes, it really only takes three minutes to get our Skinny Mississippi Pot Roast ready! It might even take less time than that, depending on how speedy you are. You just toss your roast into the pot, coat it with a simple seasoning, and pour in a cup of beef broth. That’s it!

You might be wondering how we skinny things up. Well, we start by using lean chuck roast instead of a fattier cut. After it’s slow cooked, you’ll have a warm and tender final product. Then, we achieve the flavor of a classic, savory pot roast by coating the roast with a mixture of tomato paste, onion and garlic powders, chives, parsley, thyme. Finally, it’s slow cooked on high for 4 hours (or, on low for 8 hours). This Skinny Mississippi Pot Roast is a buttery, melt-in-your-mouth meal perfect for busy weeknights.

This savory dish is delicious and filling all on its own. If you’d like to add a side, we’d recommend brown rice, quinoa, or even mashed sweet potatoes. Leftovers also create tender, juicy sandwiches. Serve the sliced meat on a whole grain roll. Top it with banana peppers and a melty slice of low-fat mozzarella for the perfect pot roast sandwich.

Easy, filling, and savory: Skinny Mississippi Pot Roast is the perfect slimmed-down version of the original Crock Pot classic. Your tastebuds (and waistline) will thank you!

Skinny Mississippi Pot Roast

Prep Time: 3 minutes

Cook Time: 8 hours

Total Time: 8 hours, 3 minutes

Skinny Mississippi Pot Roast

Yield: 8 Servings | Serving Size: about 6 ounces cooked beef | Calories: 328 | Total Fat: 12 g | Saturated Fat: 5 g | Trans Fats: 1 g | Fiber: 1 g | Sugar: 1 g | Protein: 49 g | Cholesterol: 145 mg | Sodium: 531 mg | SmartPoints (Freestyle): 7 |

Ingredients

  • 4 pound lean beef chuck roast
  • 1 teaspoon Kosher salt
  • 1/4 cup tomato paste
  • 1 tablespoon onion powder
  • 1 tablespoon garlic powder
  • 1 teaspoon dried chives
  • 2 tablespoons dried parsley
  • 1 teaspoon dried thyme leaves (not ground)
  • 1 teaspoon dried dill
  • 1 cup beef broth
  • 2 tablespoons cornstarch
  • 3 tablespoons water

Instructions

  1. Place the roast in a slow cooker.
  2. In a small bowl, combine the salt, tomato past, onion powder, garlic powder, dried chives, dried parsley, thyme, and dill. Mix well and spread over the roast. Pour the beef broth around the roast. Cover the slow cooker and cook on high for 4 hours or low for 8 hours.
  3. Carefully remove the roast from the slow cooker and set aside. Whisk together the corn starch and water until smooth. Add the mixture to the liquid left in the slow cooker and stir will. Let the mixture cook on high for about 10 minutes or until thickened.
  4. Slice the beef and serve the sauce over top. Enjoy!
https://skinnyms.com/skinny-mississippi-pot-roast/

Follow us on Pinterest and Instagram for more skinny versions of your favorite recipes.

The post Skinny Mississippi Pot Roast appeared first on Skinny Ms..


source https://skinnyms.com/skinny-mississippi-pot-roast/

Thursday, November 29, 2018

How to Eat Healthy as a Diabetic

Mediterranean Couscous Cakes | A Healthy & Delicious Mediterranean Recipe

Everyone should strive to follow a healthy diet, but it’s especially important to eat nutritious foods if you have diabetes. While people with diabetes need the same nutritional intake as the average healthy person, they also need to limit sugars and carbohydrates. Food choices matter, but it’s also important to maintain an overall healthy and active lifestyle. Keeping the body at a healthy weight can make significant differences in the blood sugar levels of a diabetic person. There are many different ways to accomplish this, but let’s take a look at how to eat healthy as a diabetic.

These are just a few suggestions and things to keep in mind if you want to eat healthier as a diabetic. Of course, you should always consult your doctor before making any major changes to your diet or workout plan.

Consider Following a Mediterranean Diet

A Mediterranean diet focuses on eating plant-based foods, such as fruits, vegetables, nuts, and whole grains. It also includes recipes with lean meats rather than red meats whenever possible. This particular diet is said to promote heart heath, which is especially important for individuals with diabetes who are at greater risk for heath disease. Some delicious options for the Mediterranean diet include:

Choose Foods that Help You Avoid Belly Fat

This might surprise you, but one of the best ways to learn how to eat healthy as a diabetic is to focus on recipes that help you avoid belly fat. Belly fat can be an early sign of obesity, which is a significant contributor to type 2 diabetes. Instead of high-fat foods, focus on foods that have fewer calories and less sugar. This doesn’t mean that you have to avoid sugar completely, but simply make smarter decisions when it comes to desserts. Here are a few terrific options to consider because they have no added sugar:

Eat More of These Foods

As a general rule, individuals who are diabetic should focus on fresh fruits and vegetables, high-quality proteins, fish and shellfish, and high-fiber recipes. These types of foods will help you maintain a healthy weight and should keep your sugar levels in check. There are many great recipes to choose from that taste great and won’t make you feel like you are missing out!

Consume Fewer Foods Like This

Avoid eating processed sugars, packaged and fast foods, white bread, and trans fats. These types of foods can increase your cholesterol, raise your blood sugar, and make you gain weight. All of these things aren’t good for a healthy person, but they can be especially bad for individuals who have diabetes. If you need some more tips on how to eat healthier and live a healthier lifestyle, check out these amazing health tips. 

Following a diabetic-friendly diet doesn’t have to be bland or boring. It’s all about striking a balance between making good food decisions while still enjoying the foods you love the most.

For more information about eating well and living a healthier lifestyle, check out our Pinterest and Instagram page to learn more.

The post How to Eat Healthy as a Diabetic appeared first on Skinny Ms..


source https://skinnyms.com/how-to-eat-healthy-as-a-diabetic/

Curried Salmon and Roasted Sweet Potatoes

There are as many different ways to prepare salmon as there are reasons to love it. In fact, this versatility itself is one of the main reasons that salmon should be your go-to protein. Although this tasty, heart-healthy fish packs plenty of flavor of its own, it still pairs well with a wide variety of different flavors and seasonings. From zesty lemon salmon to rich garlic and mushroom recipes or fresh Mediterranean versions, there’s really no wrong way to prepare salmon. Hey, if we’re to believe Cynthia Nixon, it’s even good on a cinnamon raisin bagel! Clearly there’s nothing salmon can’t do, and this Curried Salmon and Roasted Sweet Potatoes recipe proves it.

This curried salmon recipe is here to shake things up in the world of salmon dinners. Curry’s signature flavor and slightly spicy characteristic create another amazing baked salmon recipe to add to your rotation. This simple recipe for Curried Salmon and Roasted Sweet Potatoes makes it super easy to build a ton of flavor, all in one meal.

A Warm And Spicy Take On Baked Salmon

I love finding new ways to incorporate curry into recipes. Its warm, unique flavor really makes a dish stand out. Even your go-to chicken or shrimp dishes become new and exciting when you find a curried version.

This Curried Salmon and Roasted Sweet Potatoes recipe really spices up your salmon dinner repertoire. Easy, delicious, and unique, it’s the kind of recipe that makes you say, “Why haven’t I been making this for years?” Chances are good that, once you try it, it will probably become a staple in your weeknight rotation for years to come.

The salmon is brushed in a seasoning that’s sweet, savory, and spicy – all at the same time! Made with curry powder, honey, lime zest, and crushed peppers, this warm and tasty salmon is seasoned to perfection. It only needs to bake for about ten to fifteen minutes to achieve the perfect flaky–yet firm–fillet.

This salmon is delicious when served over rice noodles for more of a Thai red curry effect. It’s also great served with your favorite veggies or other go-to sides, which of course brings me to…

Thyme Roasted Sweet Potatoes

You can’t have Curried Salmon and Roasted Sweet Potatoes without roasted sweet potatoes, now can you? Of course, you can serve this salmon with whatever you want. It’s almost guaranteed to go well with any of your favorite sides.

That said, about 90 percent of the time, the hardest part about getting dinner on the table is just figuring out what to make in the first place. After all that work, if you still have to plan a side, you may decide not to start cooking at all.

To make your life a little bit easier, I’ve thrown in this easy recipe for roasted sweet potatoes. Sweet and savory, they’re the perfect side for this curried salmon. Meanwhile, they cook at 400 degrees (the same oven temp you’ll use for the salmon), which makes everything a whole lot quicker and easier.

Easy, flavorful, and complete with a built-in side! This Curried Salmon and Roasted Sweet Potatoes recipe is your newest weeknight lifesaver. Enjoy!

Curried Salmon and Roasted Sweet Potatoes

Curried Salmon and Roasted Sweet Potatoes

Yield: 4 servings | Serving Size: 1/2 cup potatoes, 1 salmon filet | Calories: 353 | Total Fat: 20 g | Saturated Fat: 4 g | Trans Fat: 0 g | Carbohydrates: 18 g | Fiber: 3 g | Sugar: 5 g | Protein: 25 g | Cholesterol: 62 mg | Sodium: 347 mg | SmartPoints (Freestyle): 4 |

Ingredients

  • For the Sweet Potatoes:
  • 2 large sweet potatoes, peeled and cut into 1 inch cubes
  • 1 tablespoon olive oil
  • 1/2 teaspoon Kosher salt
  • 1 teaspoon dried thyme leaves (not ground thyme)
  • For the Salmon:
  • 1 teaspoon curry powder
  • 1 teaspoon honey
  • 1/2 teaspoon lime zest
  • 1 teaspoon olive oil
  • Pinch of crushed red pepper flakes
  • 4 (4 ounce) salmon filets

Instructions

  1. For the Potatoes:
  2. Preheat the oven to 400 degrees.
  3. In a large bowl, toss together the potatoes, oil, salt, and thyme until the potatoes are coated in all ingredients. Spread the potatoes in an even layer on the baking sheet and bake for about 20 minutes or until soft, stirring the potatoes about half way though.
  1. For the Salmon:
  2. While the potatoes are cooking, line a baking sheet with foil and spray with nonstick spray. Keep the oven set to 400 degrees.
  3. In a small bowl, combine all the ingredients except the salmon, and mix well. Lay the salmon skin side down on the baking sheet and brush the curry mixture over top. Let sit for about 5 minutes and then bake the salmon for 10 to 15 or until the fish is flaky and firm. Serve with potatoes on the side.
https://skinnyms.com/curried-salmon-and-roasted-sweet-potatoes/

Follow us on Pinterest and Instagram for more healthy recipes!

The post Curried Salmon and Roasted Sweet Potatoes appeared first on Skinny Ms..


source https://skinnyms.com/curried-salmon-and-roasted-sweet-potatoes/

Tuesday, November 27, 2018

4-Ingredient Peanut Butter Cookies

These cookies give peanut butter fans a reason to rejoice. Because, believe it or not, cookies can be healthy! The problem with cookies isn’t usually the cookie itself, but the typical ingredients that go into making it (like white flour, butter, refined sugars and other unhealthy additives). We switched things up with our 4-Ingredient Peanut Butter Cookies by ditching those conventional ingredients and making full-flavored, nutrient-dense choices instead. With four simple ingredients, these tasty treats stay true to the beloved nut spread while also boasting a nutritious, protein-packed profile.

As if you needed another reason to make these, these healthy cookies are a breeze to make, too. They’re ready in only 15 minutes (including prep time)! Simply combine the ingredients, roll the dough into balls, and pop ’em in the oven for 10 minutes. If you have a fork, a mixing bowl, and a baking sheet, you can make these. Easy, simple, and most importantly: delicious.

A Quick Note on Peanut Butter

Since peanut butter is the star of this show, it’s really important to choose a good one. You’ll really be able to taste it in every bite because it has nowhere to hide. This isn’t one of those cookies that just has a slight peanut-buttery flavor! So put some thought into the peanut butter component before you get to baking.

If you have the time, we’d definitely recommend making your own nut butter. All it takes is some shelled peanuts and a blender to create a smooth butter (or, you can go for chunky, if that’s your preference). Unlike store-bought butters which add a lot of fat-filled ingredients and sodium, you get to control what goes into your homemade nut butter. If you do opt for a store-bought peanut butter, make sure to read the ingredients label carefully before bringing it home.

There’s no reason you couldn’t make these cookies with alternative nut butters, either, so have some fun with it! In addition to homemade butters, there are a number of healthy nut butter brands that range from almond to hazelnut and everything in between.

Naturally Gluten-Free Cookies

These Peanut Butter Cookies are so scrumptious and mouthwatering, you’ll forget they’re naturally gluten-free. That’s because we don’t need any refined flour to hold these cookies together. The peanut butter naturally has enough elasticity to create a dough, especially when it’s combined with a protein-packed egg. Add a pinch of palm sugar to sweeten things up and a dash of vanilla for its enticing aroma and you’ve just made the simplest cookies of your life.

Even when your empty fridge says its time to hit the grocery store, you probably still have the ingredients to whip up these peanut buttery delights! They store really well in the fridge for a nice, protein-filled pick-me-up snack, and you could also toss the extras to the freezer to save for a later date. So, what are you waiting for? Get to baking!

4-Ingredient Peanut Butter Cookies

4-Ingredient Peanut Butter Cookies

Yields: 14 | Serving: 1 cookie | Calories: 136 | Total Fat: 10g | Saturated Fat: 2g | Trans Fat: 0g | Cholesterol: 13mg | Sodium: 10mg | Carbohydrates: 9g | Fiber: 1g | Sugar: 7g | Protein: 5g | SmartPoints: 5 |

Ingredients

  • 1 cup natural peanut butter
  • 1 large egg, beaten
  • 1/2 cup coconut palm sugar, (plus 2 teaspoons)
  • 1 teaspoon vanilla extract

Instructions

  1. Preheat oven to 350 degrees.
  2. Mix peanut butter, 1/2 cup coconut sugar, beaten egg, and vanilla in a bowl until well-combined. Scoop a small amount of the cookie dough and roll into a 1-inch balls, about 14 balls total.
  3. Place on a parchment lined or nonstick cookie sheet.
  4. Wet a fork and then dip the fork into the remaining coconut sugar and press balls in one direction and then in the other direction to form traditional peanut butter cookie crosshatch marks and to flatten.
  5. Bake cookies 6 minutes on the middle oven rack, turning the baking sheet around and bake an additional 5-6 minutes.. Allow to cool on the baking sheet for about 25-30 minutes before removing with spatula. Enjoy!
https://skinnyms.com/4-ingredient-peanut-butter-cookies-recipe/

Love these 4-Ingredient Peanut Butter Cookies? Let us know! Leave a comment in the section below.

Find more low-calorie, healthy desserts by browsing our extensive collection on Facebook or Pinterest. Or, sign up for our newsletter and never miss a recipe! You’ll get the latest recipes, workouts, and meal plans emailed right to you!

The post 4-Ingredient Peanut Butter Cookies appeared first on Skinny Ms..


source https://skinnyms.com/4-ingredient-peanut-butter-cookies-recipe/

Monday, November 26, 2018

How To Train For A Marathon After 40

If you’re a seasoned runner, then you’re probably already aware of the basic steps that must be taken to train for a marathon. It’s important for you to understand that running in your 40’s will be a little different than running in your 20’s or 30’s. It’s never too late to begin training for a marathon, though. Perhaps you’re entirely new to the sport. No matter where you are on your journey, the following these tips will show you how to train for a marathon after 40.

Now, there’s no reason that you can’t get into the best shape of your life just because you’re getting older. You can be faster, stronger, and fitter than you’ve ever been before. The basic marathon training strategies actually remain the same regardless of your age. With that being said, you will need to pay more attention and take a little extra care of your body throughout the training routine.

Getting older means decreased bone mass, joint health, endurance, and balance and coordination. It also means increased risk of injury and dehydration, as well as a need for longer recovery periods.

If you’re serious about training for a marathon, there are a few things that you need to do to prepare yourself before you begin training. You’ll benefit from these tips no matter how young or old you are. Having the right equipment, mindset, eating habits, and training schedule will set you up for successfully completing your first marathon after 40!

Get Your Gear

Choose the Perfect Running Shoes – Having a good shoe is the key to running comfortably, as well as running safely. You don’t need to spend a ton of money, but remember that you get what you pay for. Investing in a good pair of running shoes will make the whole process a lot less painful, literally. Quality shoes are even more important for aging runners because they’re just another line of defense against unnecessary injury.

Get the Best Affordable Activewear for Any Budget – Owning a light, breathable pair of running shorts or pants will work wonders on your workouts. Being comfortable is absolutely necessary in order to have a great training session.

Listen to the Ultimate Running Playlist – While music isn’t totally necessary, any avid runner will tell you that they have a go-to playlist for their training sessions and marathons. Music has the unique ability to motivate you to keep going! You don’t have to use this playlist, but you should create your own with the songs that inspire you!

Mind Over Matter

Trust us: Your mind will try to quit on you long before your body will. Your running success depends on getting your mind right. You must acknowledge that running a marathon is no simple task. It’s going to be challenging, and there will be days that you’ll want to quit.

Preparing yourself mentally–before even beginning your training regimen–will set you up for success. Know your limits and listen to your body. Pushing yourself too hard (physically or mentally) will end in disaster.

Start by setting realistic goals for yourself. Your first marathon after 40 most likely won’t be your best or your fastest. That doesn’t mean that you can’t improve, but too-high expectations can make you want to give up. Think of your first marathon after 40 as a learning process. Greater experience will lead to greater results. If you want, you can break it down into smaller goals like completing a 5k, 10k, or half-marathon before aiming to complete a full marathon.

Vital Components

Water is a vital component for everyone, especially runners. The average person should consume at least 64 ounces, per day. Older runners require even more water each day, due to diminished kidney function and a weakened thirst mechanism.

As you age, your kidneys don’t conserve water as well as they once did, requiring a greater water intake. The thirst mechanism that tells you to drink also becomes less active as you get older. It’s a good idea to always have a water bottle with you to remind you to drink routinely. While participating in a running program, keep in mind that you should drink an extra 6-12 ounces for every 20 minutes you run.

Proper nutrition is another crucial part of training for a marathon. As you get older, your appetite begins to decrease. This is why it’s even more important for you to get as much nutrition through your food as possible. Increase your protein and fiber intake. Focus on whole foods like lean meats, whole grains, and fresh fruits and vegetables.

Carbohydrates are also essential for your pre-run fuel. This doesn’t mean you should eat a bunch of sugary, processed foods. You should focus on things like whole wheat toast, sweet potatoes, quinoa, and oatmeal. Try these 10 Foods to Fuel Your Run. Just make sure you eat 30-45 minutes prior to your run.

How to Train for a Marathon After 40

Now that you know how to prepare for your run, we can get into the nitty gritty. There are five steps to training for your first marathon after 40. Before you ask: They’re all non-negotiable.

1. You should never skip your warm-up.

There are several different warm-ups to choose from, so select the best one for you from our list of Which Warm-Up is Best for You. Properly warming-up will get your joints and muscles ready for your workout and help you avoid injuries that could set you back.

2. Pick a marathon training program and stick to it.

You can’t just workout randomly. You need to choose a plan and stick to it. Marathon training programs are designed specifically to get you to your goal, safely and effectively. Try one of these helpful running programs:

You will notice a common theme among all of them… they each progress slowly but steadily. Always focus on mileage over speed; running a marathon is all about endurance not how fast you can finish.

If you’re new to running, you should try different combinations of speed, distance, and duration to find what works best for YOU. Pace yourself and increase these three things over time. This will allow you to build endurance without burning out. You should also be sure to train on the right terrain. For instance, if your marathon takes place on pavement, then you should train on pavement. If parts of the race will be in sand or on hiking trails, you’ll want to train accordingly.

A good marathon training program incorporates rest days and cross training workouts into the running schedule. Cross-training is utilizing other forms of exercise (such as biking, swimming, skating, etc.). This will help improve your cardiovascular fitness while also giving your body a break from running.

Strength training is the most important cross-training workout for runners. As previously mentioned, aging causes your bones to become more brittle. You’ll lose approximately one percent of your bone density each year post-menopause. Strength training does more than strengthen your muscles: It also increase bone density and joint health. You should perform a total-body strength routine like this 15-Minute Circuit Workout at least twice per week.

3. Always take time to cool-down

Cooling down is just as important as warming-up, yet many people neglect to do it. When it comes to the older runner, a cool-down is even more important. Cooling down will restore your breathing and heart rate to its resting state as well as aid in the recovery process. Since it takes longer to recover as you get older, cooling down will allow you to recover more quickly so that you can keep your training on track.

4. Stretch it out with these 10 Essential Stretches for Runners.

After your cool down, you should should always stretch. The cool down helps remove the lactic acid out of your muscles, but stretching will keep them from getting tight. Flexibility is key to maintaining proper running form and avoiding injury.

5. Take time to recover.

The importance of the recovery process cannot be stressed enough, especially for running a marathon after 40. As you get older, your body takes longer to heal, whether it be from injury or training. Rest days are just as important as training days. If you don’t give your body enough time to recover, it will not function optimally and will almost always result in injury. Don’t skip the rest days. If you absolutely must workout every day, choose an exercise that’s easier on the joints, like swimming or biking.

——————————————————————————————————————————————————————–

Your age should never be an excuse for not getting into the best shape of your life. These tips on how to train for a marathon after 40 will keep you safe while helping you achieve your goals. Age is just a number, but completing your first marathon after 40 is something that you should celebrate.

It will take hard work and dedication, but following these tips will help you get there! Check out these Top 10 Marathons to Add to Your Bucket List. Signing up for a race is your first step in the right direction. If you’re new to running, pick a race that is at least six months out. This will give you ample time to train. If you’re a seasoned runner, you can sign up for a race that’s six or more weeks out.

We want to hear your thoughts! Are you new to running or have you been doing it for a while? Have you run marathons in the past or are you looking to complete your very first one? Do you have any tips to share for how to train for a marathon after 40? Let us know in the comment section!

Follow us on Facebook, Pinterest, or Instagram for all of our future running tips and routines.

The post How To Train For A Marathon After 40 appeared first on Skinny Ms..


source https://skinnyms.com/train-for-a-marathon-after-40/

Super Easy Pork Tenderloin with Garlic Rosemary

When it comes to quick-and-easy dinners, chances are you think chicken. The truth is, there’s nothing wrong with chicken! It’s easy, it’s tasty, it’s versatile, and you can make a huge variety of healthy, delicious meals with it. Then again, because it’s so easy and such a natural go-to, it can be pretty easy to accidentally fall into a chicken rut. Try mixing things up with our Super Easy Pork Tenderloin recipe.

I used to shy away from pork tenderloin in the past, especially when the only thing on my mind was putting together a quick-and-easy dinner. Tenderloin just seemed too complicated when the chicken was right there. Fortunately, this simple recipe proves that prepping a pork tenderloin dinner can be just as easy and painless as your favorite go-to chicken recipe. This Super Easy Pork Tenderloin with Garlic Rosemary recipe makes juicy, tender pork a weeknight reality.

Don’t Forget to Prep Ahead

The most complicated thing about this recipe is that it requires a bit of forethought. It does require two hours of (non-active) prep. That means it’s not the kind of dinner you’d to want to throw together on a whim when you get home late from work.

That being said, this recipe is an excellent choice for a busy weeknight dinner if you plan ahead! The pork needs to marinate for at least two hours before cooking, but it’s one of easiest meals to prep-up the night before. Our recipe says two hours of marinating time, but you could let sit overnight. If anything, the extra time would only make your pork that much juicier and more tender.

Prepped ahead, this Super Easy Pork Tenderloin with Garlic Rosemary is a great option for busy weeknights. Everybody knows the hardest part of making dinner is deciding what to make in the first place. If you’ve prepped this pork tenderloin the night before, the hard part is already over! When you get home from work, you’ll have dinner planned, prepped, and ready to go. All you have to do is cook it up and bring it to the table.

Cooking and Serving Tips

Once the pork has marinated, cook the tenderloin in a large skillet over high heat until it’s golden brown on all sides. This is a crucial first step in the cooking process because it helps the pork get a perfectly crispy exterior. Contrast that to the juicy, tender inside and you have a winner!

Then, place the seared pork on a lined baking sheet and bake it for 45 minutes (or, until it’s cooked through). The final step requires some patience, but it’s worth it: Let the pork sit for another 15 minutes before slicing and serving. This will help it stay juicy and tender!

This Super Easy Pork Tenderloin recipe proves that a delicious, elegant meal doesn’t have to be complicated! A simple pork tenderloin is easy enough to cook that it could become a regular fixture in your weeknight meal rotation. Enjoy!

Super Easy Pork Tenderloin With Garlic Rosemary

Super Easy Pork Tenderloin With Garlic Rosemary

Yield: 4 servings | Serving Size: about 4 ounces | Calories: 271 | Total Fat: 13 g | Saturated Fat: 3 g | Trans Fat: 0 g | Carbohydrates: 0 g | Fiber: 0 g | Sugar: 0 g | Protein: 35 g | Cholesterol: 111 mg | Sodium: 421 mg | SmartPoints (Freestyle): 6

Ingredients

  • 1 teaspoon Kosher salt
  • 1/2 teaspoon ground black pepper
  • 5 cloves garlic, minced
  • 2 teaspoons dried ground rosemary
  • 2 tablespoons olive oil
  • 1 1/2 pound lean pork tenderloin

Instructions

  1. In a small bowl, combine the salt, pepper, garlic, rosemary, and 1 tablespoon of the olive oil. Mix well and spread over the tenderloin. Cover and refrigerate for 2 hours or overnight.
  2. Preheat oven to 400 degrees. Line a baking sheet with foil and spray with nonstick spray.
  3. Brush most of the seasoning off the tenderloin. Heat the remaining oil in a large skillet on high. Once the oil is hot, cook the tenderloin on all sides until golden brown. Place the seared pork tenderloin on the prepared pan and bake for 45 minutes or until cooked through. Let the pork sit for about 15 minutes before slicing and serving, this will help the tenderloin stay juicy!
https://skinnyms.com/super-easy-pork-tenderloin-with-garlic-rosemary/

Follow us on Pinterest and Instagram for more super easy, super healthy recipes.

The post Super Easy Pork Tenderloin with Garlic Rosemary appeared first on Skinny Ms..


source https://skinnyms.com/super-easy-pork-tenderloin-with-garlic-rosemary/

Sunday, November 25, 2018

Easy Tuna Casserole Recipe

Sometimes, you need a comforting meal that makes you feel like you’re having a cheat day. Don’t feel bad about it: We found a way for you to have your comfort without sacrificing nutrition! Ooey, gooey, cheesy baked perfection is what you’ll get with this Easy Tuna Casserole recipe. It mimics the delicious, creamy taste of tuna casseroles from days gone by, but this lightened-up version is much healthier than anything that was whipped up in your grandmother’s kitchen. Best of all, it is packed full with tuna, so you’ll enjoy the benefits of omega 3 fats and lean protein while warming up with this delectable dish.

Traditional tuna casseroles have a tendency to be greasy, fattening, and all-around unhealthy. They also gets a bad rap for being an “old-fashioned” dish, or something most people have little use for these days. Despite its less-than-stellar reputation, sometimes you get a hankering for the comfort foods from your childhood! That’s when it’s time to turn to this Easy Tuna Casserole recipe.

Cheesy and Delicious

You won’t believe that a meal this cheesy could also be healthy! Our Easy Tuna Casserole recipe is the perfect recipe to turn to when you’re looking for a tuna meal that’s out of the ordinary. Tuna is a great source of lean protein, but plain old tuna salad gets boring time after time. It’s also not always the right option when the weather is cold and blustery.

Mixing tuna with noodles and cheese gives this dish a rich, indulgent feel without all the unappealing aspects from other tuna casserole recipes. Instead of regular macaroni (which uses refined white flour), we opt for whole-wheat noodles. They contain plenty of complex carbohydrates to keep you feeling fuller for longer. We also snuck some veggies into the dish–mushrooms and peas–but don’t worry, this dish is so cheesy no one will notice!

The other big change we made was to ditch the condensed soup. Most traditional casserole recipes use canned condensed soup, like cream of mushroom or cream of chicken. While there’s nothing wrong with cooking using that ingredient, it does happen to be very high in fat and sodium. Instead, we used low-fat cream cheese and milk to get the same result with significantly more nutrition.

If you are looking for a fun dish to bring to a party or office event, or you know your kids will love a gooey tuna casserole, try our Easy Tuna Casserole recipe. It’s a great lightened-up version of the comfort classic that everyone expects.

Easy Tuna Casserole Recipe

Easy Tuna Casserole Recipe

Yields: 6 Servings | Serving Size: 1 Cup | Calories: 437 | Total Fat: 21 | Saturated Fat: 10 | Trans Fat: 0 g | Cholesterol: 65 mg | Sodium: 600 mg | Carbohydrates: 38 | Dietary Fiber: 6 | Sugar: 9 | Protein: 26 | SmartPoints (Freestyle): 13 |

Ingredients

  • 4 cups cooked whole wheat noodles (macaroni was used in this recipe, egg noodles also will work)
  • 2 tablespoon extra virgin olive oil
  • 1 small yellow onion, diced
  • 8 ounces sliced mushrooms, white or button (wipe clean)
  • 2 (4.5 ounce) cans solid white Albacore Tuna in water, shredded (add tuna and water)
  • 1 cup frozen green peas
  • 1 (8 ounce) package cream cheese, softened, low fat
  • 1 cup low-fat milk
  • 1-1/2 cups (reduced-fat) cheddar cheese, shredded (recommend block cheese)

Instructions

  1. Preheat over to 375 degrees.
  2. Note: If desired, add additional cheese to the top of the casserole before baking.
  3. Cook noodles according instructions on the package or al dente.
  4. In a medium skillet add oil and sauté onions and mushrooms over medium-low heat until mushrooms begin to release moisture, about 10 minutes. In a large mixing bowl, combine sautéed onions and mushrooms and all remaining ingredients, reserving 1/2 cup cheddar cheese for the top.
  5. Add the tuna mixture to a 3 quart casserole dish or 9" baking pan, top with the 1/2 cup of remaining cheddar cheese. Bake 15 minutes covered and 10 minutes uncovered, or until cheese is hot and bubbly.
https://skinnyms.com/tuna-casserole/

Don’t miss out on the latest and greatest from SkinnyMs.! Be sure to subscribe to our newsletter. Also, like our Facebook page and follow us on Pinterest for tasty recipes, clean eating tips, and healthy lifestyle resources.

For more delicious and nutritious recipes from SkinnyMs., check out our SkinnyMs. Recipe Collection of 101 Fan Favorites.

Do you have a favorite SkinnyMs. recipe? We’d love to hear about it. Tell us what you think in the comments section below.

The post Easy Tuna Casserole Recipe appeared first on Skinny Ms..


source https://skinnyms.com/tuna-casserole/

Asian Chicken Wraps

We love Asian dishes, and we’ll admit that there’s almost nothing easier than ordering take-out. Unfortunately, we aren’t the biggest fans of all the extra fat, calories, and preservatives that often accompany takeout food. Luckily, our Asian Chicken Wraps lets us savor one of our favorite Asian meals by making it in the comfort of our own home! This is one of our favorite easy, healthy dinners to make on a weeknight because it comes together so quickly and tastes amazing.

Our version tastes just as good as a restaurant’s, but it contains 100% clean ingredients and only 123 calories per serving! We make our Asian Chicken Wraps with crispy chicken, fresh cabbage or lettuce, and a sweet-and-tangy sauce. It really packs in all the flavor you’ve come to expect from Asian fare. It might have a few ingredients on the list, but it’s actually super easy to make. You only need to use one pan for this stir-fry dish, so clean up is a breeze. And, it’s ready in 30 minutes – including prep time. What’s not to love?

Lettuce Wraps are a Great Low-Carb Option

Anyone who’s following a low-carb diet (or, a no-carb diet like Keto or Paleo) will tell you that it’s hard to live without the bread! This recipe really takes advantage of nature’s original wrapper: lettuce. You can use any kind of lettuce, but we find that Napa cabbage works best. It holds together well enough to prevent the fillings from falling out, but it’s not too stiff that it’ll fall apart if you fold it. You could also use romaine lettuce leaves, Bibb, or iceberg lettuce, if you prefer.

Skipping the bun means these Asian Chicken Wraps clock in at just 13 carbs per serving. And, these wraps have so much flavor between the stir fry sauce and the dipping sauce. Combine that with the cashews, mushrooms, and lean protein from the chicken and you won’t feel like you’re missing out on anything at all!

If you’re not on a low-carb journey and you want to make these wraps a little heartier, try our version of clean-eating whole wheat tortillas! They only have five ingredients (plus water) and feature heart-healthy whole grains. Each tortilla would add 175 calories (and 20 carbs, for those of you counting your macros), but they’re filled with beneficial complex carbohydrates. That means they’ll definitely keep you feeling fuller for longer!

You might also like these 5 Clean Asian Inspired Meals for Take-Out. Who needs to order out for food when it’s tastier and healthier to make it at home? Plus, you get to control the ingredients when you cook at home, which means less sodium and no MSG.

Asian Chicken Wraps

Asian Chicken Wraps

Yield: Servings 6 | Serving Size: 1 Wrap with 3/4 Cup Cubed Chicken | Calories: 123 | Total Fat: 3 g | Saturated Fat:1 g | Trans Fat: 0 g | Cholesterol: 27.5 mg | Sodium: 349 mg | Carbohydrates: 13 g | Dietary | Fiber: 1 g | Sugars: 11 g | Protein: 11 g | SmartPoints (Freestyle): 6 |

Ingredients

  • For the Sauce
  • 2 tablespoons honey
  • 1/2 teaspoon rice wine vinegar
  • 2 tablespoons lite soy sauce
  • For the Dipping Sauce:
  • 1/4 cup honey
  • 1/2 cup warm water
  • 2 tablespoon lite soy sauce
  • 2 tablespoon rice wine vinegar
  • 2 tablespoon ketchup (recipe for ketchup)
  • 1 tablespoon freshly squeezed lemon juice
  • 1/8 teaspoon sesame oil
  • 1 tablespoon Dijon Mustard
  • For the Chicken:
  • 1 tablespoon canola oil
  • 1 tablespoon sesame oil
  • 3 skinless chicken breast filets, cubed into about 1/2″ pieces
  • 1 cup diced cashews, lightly roasted, (optional: 1 (8 ounce) can water chestnuts, diced)
  • 1/2 cup button mushrooms, diced
  • 1/2 cup finely diced yellow onion
  • 2 cloves garlic, minced
  • 6 large cabbage leaves, such as Napa cabbage

Instructions

  1. For the Stir-Fry Sauce:
  2. Combine all ingredients in a small bowl and setting aside.
  1. For the Dipping Sauce:
  2. Combine the honey and warm water in a medium sauce pan. Add the remaining ingredients to the honey & water mix, turn to medium heat and bring to a simmer. Continue cooking approximately 5 minutes. Place the dipping sauce in a bowl for serving and set aside.
  1. For the Chicken:
  2. Heat the canola oil and sesame oil in a large skillet or wok. On medium-high heat add cubed chicken breast and cook until it has lost its pink color, 8-10 minutes. Drain chicken by pouring off liquid. With the chicken still in the skillet add the, already prepared, Stir-Fry Sauce to the chicken along with water chestnuts, mushrooms, onion and garlic. Stir-fry for approximately 4-5 minutes on medium heat.
  3. Place approximately 3/4 cup cooked chicken on individual cabbage leafs, drizzle with dipping sauce. Allow everyone to add additional dipping sauce if they wish. Slightly fold the wrap when eating. A little sauce may spill out but no big deal, just add more, there’s plenty to go around. Enjoy!!!
  4. Bragg Liquid Aminos is another Gluten-Free option for soy sauce.
https://skinnyms.com/asian-chicken-wrap/

Don’t miss out on the latest and greatest from SkinnyMs. Be sure to subscribe to our newsletter. Or, like our Facebook page and follow us on Pinterest for tasty recipes, clean eating tips, and healthy lifestyle resources. Meal planning just got easier!

For more delicious and nutritious recipes from SkinnyMs., check out our SkinnyMs. Recipe Collection of 101 Fan Favorites. Do you have a favorite SkinnyMs. recipe? We’d love to hear about it. Tell us what you think in the comments section below.

The post Asian Chicken Wraps appeared first on Skinny Ms..


source https://skinnyms.com/asian-chicken-wrap/